Some more eye-teasing stuff stay tuned for the upcoming RetroQuiz update…
Meanwhile you can download and play v1.4 from


Feature Graphic for Play Store
![Screenshot_2014-08-08-20-32-19[1]](https://elefasgr.files.wordpress.com/2014/08/screenshot_2014-08-08-20-32-191.png?w=180&h=300)
new HighScore Screen
![Screenshot_2014-08-08-20-32-29[1]](https://elefasgr.files.wordpress.com/2014/08/screenshot_2014-08-08-20-32-291.png?w=180&h=300)
new Game Play Screen

Some more eye-teasing stuff stay tuned for the upcoming RetroQuiz update…
Meanwhile you can download and play v1.4 from
Feature Graphic for Play Store
new HighScore Screen
new Game Play Screen
Looking to fresh things up in RetroQuiz, so how about more arcade style finishes in game play screen? Stay tuned for the update soon!
This is what it looks in current version:

And this is how it will look in the 1.5 update:
![Screenshot_2014-08-03-15-15-44[1]](https://elefasgr.files.wordpress.com/2014/08/screenshot_2014-08-03-15-15-441.png)

Boasting over 150 questions about videogame giants like Atari, Commodore, Nintendo and Sega, it is guaranteed it will keep you absorbed trying to complete one question after the other. VCS 2600, Lynx, Jaguar, Amiga, NES, SNES, Gameboy, MasterSystem, MegaDrive, Saturn, Dreamcast, GameGear are waiting to challenge your brain!
Bring back old memories, compete with friends in leaderboards, unlock achievements, have fun and learn many secret aspects of the videogame industry!
Features:


for playing 2-players master system games. Download instructions GGEXT_TO_DB9
1) GameGear EXT port desoldered from a non functioning game gear (it’s a pity to destroy a working one)
2) Gear-To-Gear Cable (for connecting 2 game gears together, we will use it to connect the adaptor to it, it will remain intact)
2) DB9 male connector
3) ribbon cable or wires
4) patience
Desolder with patience and carefully the ext port from game gear’s motherboard. Take extra caution, in my case I had 2 pins destroyed while trying to get it out of the board. Thankfully as we only need 7 pins I replaced them with the ones that were not going to be used.

Once it is removed, solder some wire or ribbon cable to the pins located at the back of it. Then solder the other ends to a DB9 male connector as following

|
GG EXT. PORT |
DB9 (MALE) |
FUNCTION |
|
1 |
3 |
LEFT |
|
2 |
4 |
RIGHT |
|
3 |
1 |
UP |
|
4 |
2 |
DOWN |
|
5 |
UNUSED |
|
|
6 |
6 |
BUTTON 1 |
|
7 |
7 |
|
|
8 |
8 |
GND |
|
9 |
9 |
BUTTON 2 |
|
10 |
UNUSED |
When ready, plug your gear-to-gear cable on your gamegear, on the other end plug the adaptor and finally plug a mastersystem or megadrive gamepad to the db9 port. Load a mastersytem game on your gamegear and have fun!
Οι σεισμοί δεν μας τρομάζουν,
μόνο οι δειλοί φωνάζουν,
Όταν τρέμει η γη γελούμε,
όλοι πίνουμε γλεντούμε….
Kefalonia, our beautiful island and my sweet homeland has been struck from earthquakes twice in one week (26/01/2014, 03/02/2014). Thank God, no human loses, but buildings, private properties and civil infrastructure have suffered many damages. Most damages have been recorded in Lixouri area which was close to the quakes’ epicenter.
Quakes are somewhat familiar to the Kefalonian people, the elder of them have still fresh in their memories the shocking quake in 1953 of 7.2 magnitude which devastated the island. Hence the quoted verse from a traditional song (freehand translation: earthquakes do not frighten us, only cowards scream, when earth shakes we laugh, drink and have fun)
Lets hope things to get better from now on, Kefalonia “bon courage”, wishing to all quake struck people to hold on, fight back and be strong
Νέος σεισμός εγένετο εις την Κεφαλληνία
χρόνια τον αναμέναμε να σπάσει την ανία.
Ο κόσμος σε κατάσταση βρέθηκε πανικού
και μερικοί ετάζανε λαμπάδες του Χριστού.
*
Με το ‘να χέρι ο γείτονας έκανε το σταυρό του
με τ’ άλλο του εμούτζωνε αλλόφρων το θεό του.
Από τηλεοράσεως βγήκαν ανακοινώσεις
και βαρυσήμαντες πολλές εγίνανε δηλώσεις.
* Πρώτοι απ’ όλους μίλησαν οι δημοσιογράφοι
που είναι σε όλα ειδικοί κι άριστοι σεισμογράφοι.
Εγράψανε διάφοροι μας δώσαν εξηγήσεις
διαβάσαμε κι ακούσαμε άπειρες αναλύσεις.
*
Από παντού κατέφθασαν, γεωλόγοι σεισμολόγοι
μακρόχρονα συμβούλια έκαναν στ’ Αργοστόλι.
Καθένας τους εξέφραζε μία αντιγνωμία
πως εξελίσσετε ο σεισμός και ποια είν’ η αιτία.
*
Κι ο κόσμος που ανησυχεί, θαρρεί πως κάνουν γλέντι
κι ελπίδα εναποθέτουνε στον Άκη τον Τσελέντη.
Πολλά ανακοινώθηκαν απ’ όλα τα υπουργεία
πως εκινητοποίησαν ως και τη ναυτιλία .
*
Όπως καταλαβαίνετε η κάλπη πλησιάζει
και έθιμο είναι παλιό… ότι, όποιος θέλει τάζει…
Φίλοι μην περιμένετε χρήματα για βοήθεια
δοθήκανε για τον Ξηρό που εχάθη στα Πατήσια.
*
Κάποιος κακοπροαίρετος είπε πως για το ρήγμα
τάμα στον Άγιο έκαναν να δημιουργηθεί το σχίσμα.
Κι αφού από ανέκαθεν όλη η Παλική,
αρνείται στην Κεφαλονιά να ενσωματωθεί
εδιευκόλυν’ ο σεισμός αυτή να τελεστεί.
*
Μα ένα είναι σίγουρο που παραδέχονται όλοι
Πως θέλουν την απόσχιση Ληξούρι κι Αργοστόλι.
Δ.Αρμόδωρος
– See more at: http://www.kefaloniatoday.com/arthra-apopsis/satira/otan-ston-kefaloniti-o-sismos-ginete-satira-90354.html?fb_ref=recommendations-bar#sthash.VL8m2hkx.dpuf
(photos courtesy of http://www.inkefalonia.gr)


(1953 photos – http://greece-report.blogspot.com/2014/01/1953.html)


This wonderful tool:  from http://lotharek.pl/category.php?kid=7
needed to find an place to live inside my A600. I didn’t want to destroy the case (my hands are not very delicate) so I figured out to place the HxC rev C inside my A600 and build a daughterboard to house the screen and buttons. The daughterboard and the main HxC board will be connected together with thin ribbon cables passing through the ventilation holes of amiga’s case. Note you have to remove the original floppy drive to make space for the mod.
Enough talking, some photos to guide you.
First of all try to source the following parts:

– Some ribbon cable
– 3 buttons the same type as in the HxC
– some connectors as you can see in the picture, in order to fit the screen (dont know the exact names, the pic should be self explaining)
– a rectangular piece of solder board (mine is 8cm x 5cm, not shown in this picture)
When you have all the parts needed, detach the screen from the main board

then create the daughterboard

put the screen connector on top and at the bottom the three buttons.
Then solder a 6-ribbon cable to the top ends of the buttons, and another 6-ribbon cable to the bottom ends of the buttons

finally solder a 12-ribbon cable to the screen connectors.
The final result should be something like this:

That’s it with the daughterboard, lets move to the main board.
Pass the 3 ribbons through the amiga case ventilation holes on top of the “Amiga” logo. I advise you to remove the keyboard ribbon for your convenience.
get a 12-ribbon cable and solder it to the ends of the buttons as in the picture. The left 6 are for the top button ends, the right 6 for the bottom ends

Solder the female black connector to the daughterboard’s button’s ribbons, take care to solder the wires in the same order as they are in the picture above.
Connect the 12-ribbon cable from the daughterboard’s screen connector to the mainboard’s screen connector keeping the correct order. I used these white 3-hole connectors to make it detachable. Something like in this picture:

Then all connections should be connected, make a check to see if everything is ok, and place the mainboard as close as the floppy’s entrance is in the amiga’s case, in order to be able to take out and place in the sd card. Notice I put some insulation on the back of the mainboard in order not to make any short circuit with the amiga’s motherboard.

Connect the floppy cable, the power cable (dont forget the keyboard cable) and put the case back.
The final result should be something like this:

(the blue sd card shows through the floppy hole)

(the daughterboard with the screen and it’s buttons)
some more pictures:


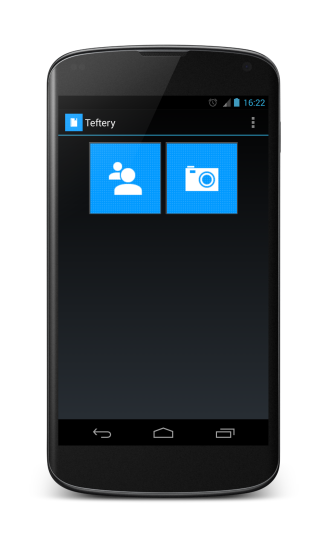
A small, simple and handy (I suppose) android app for keeping track students’ attendances and payments. Suitable for trainers, gyms, teachers etc.
With it you can create QR code images for every trainee/student, pass it to them and have the application to scan the QR codes when a lesson or class is about to start. It’s a fun and quick way to write down the absences (well… attendances) with almost no effort from the trainer/teacher! My dance lessons teacher got rid of her notepad and pen and uses “Teftery” from day one!
For trainers who are trying to write down attendances and payments, Teftery provides an easy-to use mobile app
that helps them to record this info and share it, in whatever way they want, with their trainees.Benefits
Exploiting QR Code Technology, Teftery enables students to record their attendance in an efficient way,
saving trainer’s time and resources (e.g secretary in a gym’s reception).The trainer may choose to share payment info, through weekly reports, with his/her trainees,
in order to avoid disputes over payments.Business Intelligence services are provided for the trainer (e.g alerts on students who are missing lessons etc..)
Contact Info:
http://www.i-m.co/pylm/teftery/
teftery@gmail.com
In order not to be forgotten or lost in time, my humble efforts of contributing to the emulator scene…
Watara Supervision emulators (ports of Potator v0.6 by David Raingeard) for Windows Mobile Pockect PC and the all mighty Sega Dreamcast! Download them at your own risk, keep in mind that it’s old stuff running on old machines (pocket pcs or sega dreamcast), no support whatsoever.
Symptoms:
Reason: